Free player library
DayZ Crafting & Survival
Clear vanilla recipes, building stages and the tools needed to make them — designed for a phone in the middle of a DayZ session.
Vanilla first. A reviewed core library of vanilla recipes and construction paths. Community-server mods can change recipes, and are deliberately kept separate until their exact mod documentation is supplied.
Find a recipe
39 reviewed recipesCrafting library
39 shown
 Rope from ragsMakes: RopeSurvival basics
Ingredients
How to make it
- Combine two full stacks of six rags.
Good to know: Rope is used in many kits, fishing and improvised bags.
 Rope from gutsMakes: RopeSurvival basics
Ingredients
Tools
How to make it
- Combine the guts with a sharp tool.
Good to know: Wash hands after handling raw animal materials.
 SplintMakes: SplintMedical
Ingredients
How to make it
- Combine one of the listed bindings with two short sticks.
Good to know: Use to treat a broken leg.
 Simple fishing rodMakes: Simple Fishing RodFishing
Ingredients
How to make it
- Combine the long stick with rope.
- Attach a fishing hook and bait before fishing.
Good to know: A basic sustainable-food setup once paired with a hook and bait.
 Bone fishing hookMakes: Bone Fishing HookFishing
Ingredients
Tools
How to make it
- Combine bones with a sharp tool.
Good to know: Attach it to a simple fishing rod, then add bait.
 Wooden fishing hooksMakes: 2 Wooden Fishing HooksFishing
Ingredients
Tools
How to make it
- Combine a short stick with a sharp tool.
Good to know: A quick alternative when bones are unavailable.
 Small fish trapMakes: Small Fish TrapFishing
Ingredients
Tools
How to make it
- Combine a plastic bottle with a sharp tool, then deploy the trap in suitable water.
Good to know: Check it later rather than expecting an instant catch.
 Fish net trapMakes: Fish Net TrapFishing
Ingredients
How to make it
- Combine metal wire and netting, then deploy the trap in suitable water.
Good to know: A larger passive fishing option.
 TripwireMakes: TripwireSurvival basics
Ingredients
How to make it
- Combine the wire and sticks, then place the completed tripwire.
Good to know: The placed tripwire can be configured with compatible attachments.
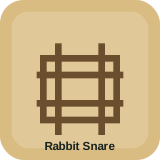 Rabbit snareMakes: Rabbit SnareSurvival basics
Ingredients
How to make it
- Combine the wire and short stick, then place the snare in an appropriate area.
Good to know: It is a passive trap, so return later to check it.
 Short sticks from a long stickMakes: 3 Short SticksMaterials
Ingredients
Tools
How to make it
- Combine a long stick with a sharp tool.
Good to know: Short sticks are used in splints, kits, fires and traps.
 Short sticks from firewoodMakes: 3 Short SticksMaterials
Ingredients
Tools
How to make it
- Combine firewood with a hatchet or axe.
Good to know: Useful when you have already prepared firewood.
 Wooden planks from a logMakes: 4 Wooden PlanksMaterials
Ingredients
Tools
How to make it
- Combine a wooden log with a hacksaw.
Good to know: Planks are used by fences, crates and other base construction.
 Burlap stripsMakes: Burlap StripsMaterials
Ingredients
Tools
How to make it
- Combine a burlap sack with a sharp tool.
Good to know: Used for improvised bags and ghillie pieces.
 Metal wire from barbed wireMakes: Metal WireMaterials
Ingredients
Tools
How to make it
- Combine barbed wire with pliers.
Good to know: Used in traps and flag-pole construction.
 Wooden crateMakes: Wooden CrateStorage
Ingredients
Tools
How to make it
- Combine the planks and nails while using a hammer or hatchet.
Good to know: A compact crafted storage container.
 Improvised courier bagMakes: Improvised Courier BagGear
Ingredients
How to make it
- Combine a burlap sack and rope.
Good to know: Upgrade it with three short sticks for an improvised backpack.
 Improvised backpackMakes: Improvised BackpackGear
Ingredients
How to make it
- Combine an improvised courier bag with three short sticks.
Good to know: Craft the courier bag first if you do not already have one.
 FireplaceMakes: FireplaceFire and cooking
Ingredients
How to make it
- Combine a short stick with one suitable kindling material.
- Add fuel and use a compatible ignition source to light it.
Good to know: The placed fireplace can be upgraded with stones or a cooking stand.
 Stone circle fireplaceMakes: Stone Circle FireplaceFire and cooking
Ingredients
How to make it
- Add eight large stones to a placed fireplace.
Good to know: A placed construction upgrade, not a loose inventory combination.
 Stone ovenMakes: Stone OvenFire and cooking
Ingredients
How to make it
- Add sixteen large stones to a placed fireplace.
Good to know: A placed construction upgrade, not a loose inventory combination.
 Cooking standMakes: Cooking StandFire and cooking
Ingredients
How to make it
- Combine the sticks, then attach the stand to a suitable fireplace.
Good to know: The stand is a fireplace attachment.
 Fire barrelMakes: Fire BarrelFire and cooking
Ingredients
Tools
How to make it
- Combine the barrel with a sharp tool.
Good to know: Prepare it safely before adding fuel and lighting it.
 Improvised torchMakes: Improvised TorchFire and cooking
Ingredients
How to make it
- Combine a short stick with rags.
Good to know: Light it only when ready; it reveals your position at night.
 Fence kitMakes: Fence KitBase building
Ingredients
How to make it
- Combine two short sticks and rope.
- Place the kit in its final orientation before beginning construction.
Good to know: The kit is the starting point for a vanilla fence or gate.
 Fence baseMakes: Placed Fence BaseBase building
Ingredients
Tools
How to make it
- Place a fence kit.
- Add two logs and build the base with a digging tool.
Good to know: Build a base first; wall frames are constructed on the placed base.
 Fence frame stagesMakes: Framed FenceBase building
Ingredients
Tools
How to make it
- Build the lower frame with 4 planks and 8 nails.
- Build the upper frame with 5 planks and 10 nails.
Good to know: This total covers both frame stages only. Add the wall sections separately when you want the fence enclosed.
 Wooden fence wall sectionMakes: One Wooden Fence Wall SectionBase building
Ingredients
Tools
How to make it
- Build either the lower or upper wooden wall on an already framed fence.
Good to know: Repeat this recipe for each wooden wall section you want on the framed fence.
 Metal fence panelMakes: Metal Fence PanelBase building
Ingredients
Tools
How to make it
- Build the chosen lower or upper metal wall section on a framed fence.
Good to know: These materials are for one metal wall section; build the fence base and frame first.
 Watchtower kitMakes: Watchtower KitBase building
Ingredients
How to make it
- Combine four short sticks and rope.
- Place the kit before adding logs, planks, nails and the correct construction tools.
Good to know: Construction materials depend on the levels and sections you build.
 Shelter kitMakes: Shelter KitBase building
Ingredients
How to make it
- Combine four short sticks and rope.
- Place the kit before supplying the materials for a shelter variant.
Good to know: Choose improvised, tarp or leather shelter after the kit is placed.
 Improvised shelterMakes: Improvised ShelterBase building
Ingredients
How to make it
- Place a shelter kit.
- Add four long sticks and fifty short sticks, then finish the available construction actions.
Good to know: The most material-heavy but fully improvised shelter path.
 Tarp shelterMakes: Tarp ShelterBase building
Ingredients
How to make it
- Place a shelter kit.
- Add four long sticks and four tarps, then finish the available construction actions.
Good to know: A lower-stick alternative to the improvised shelter.
 Leather shelterMakes: Leather ShelterBase building
Ingredients
How to make it
- Place a shelter kit.
- Add four long sticks and eight tanned leather pieces, then finish the available construction actions.
Good to know: Use vanilla tanned leather; modded leather items are separate.
 Flag Pole KitMakes: Flag Pole KitBase building
Ingredients
How to make it
- Combine three short sticks and rope.
- Place the kit where the flag pole will stand.
Good to know: This is the start of a full Flag Pole, not a complete territory flag by itself.
 Flag Pole constructionMakes: Completed Flag PoleBase building
Ingredients
Tools
How to make it
- Build the base with 1 log and a sledgehammer.
- Build the support with 32 large stones and 6 more logs using a shovel or pickaxe.
- Build the pole with 3 logs, 60 nails, rope and metal wire using a hammer or hatchet.
- Attach and raise a flag to activate the territory-lifetime refresh.
Good to know: A raised flag pole refreshes supported object lifetimes in its vanilla 60-metre area; the flag needs periodic raising.
 Improvised boltMakes: Improvised BoltWeapons
Ingredients
Tools
How to make it
- Combine a short stick with a sharp tool.
Good to know: Can be upgraded with feathers.
 Feathered boltMakes: Feathered BoltWeapons
Ingredients
How to make it
- Combine an improvised bolt and feathers.
Good to know: Use the correct compatible crossbow.
 Improvised bottle suppressorMakes: Improvised SuppressorWeapons
Ingredients
How to make it
- Combine a plastic bottle and duct tape.
- Attach only to a compatible firearm.
Good to know: Improvised suppressors wear out quickly.